
You can log a payment in the app using three different methods—choose the one that suits your workflow best.
Three Ways to Add a Payment
Option 1: From the Money Section
Tap the Money icon on the lower navigation pane

Option 2: Using the Quick Add Button
Tap the blue circle (+) icon (usually at the bottom of the screen).
From the options that appear, select "Income."
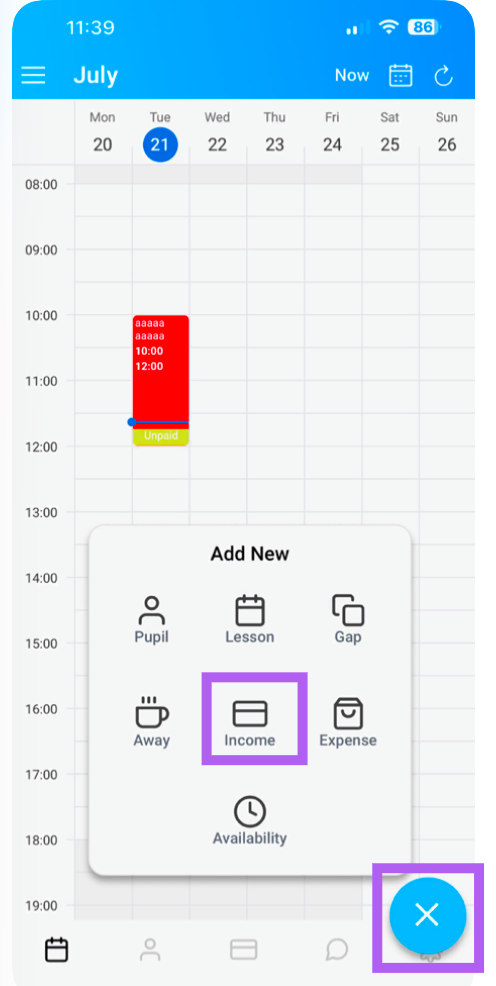
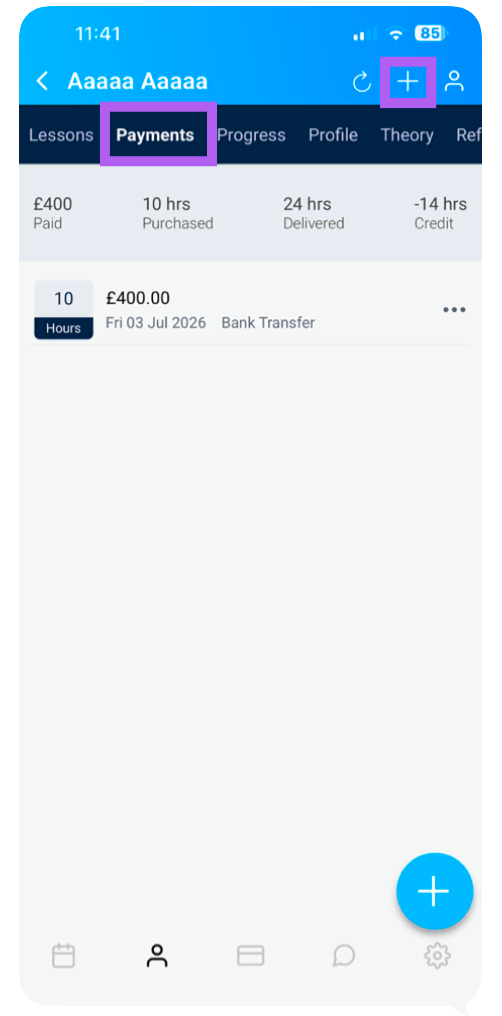
Option 3: From a Pupil's Profile
Navigate to Pupils >> Select the pupil >> Payments >> Tap "+."
Complete the Payment Details
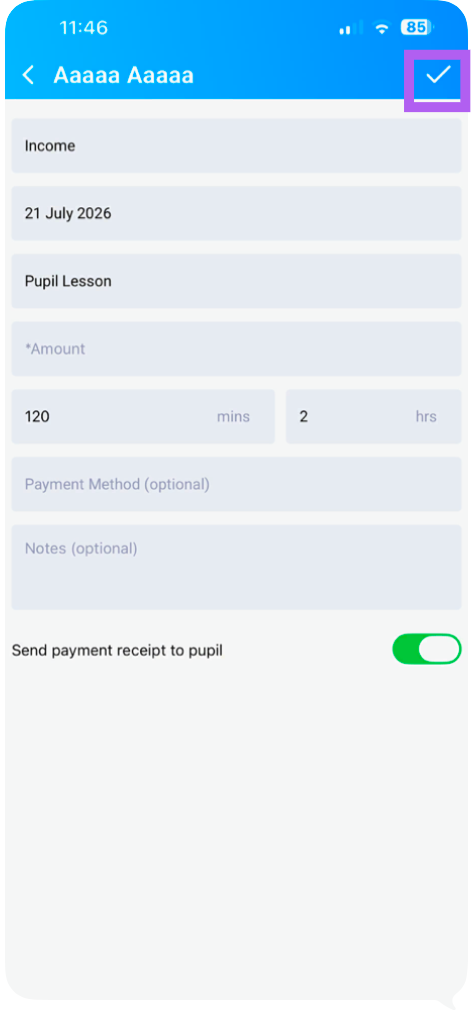
Once you've chosen your preferred method, you'll be taken to the Add Payment screen. Fill in the following details:
| Field | Description |
|---|
| Amount | Enter the payment amount. |
| Date | Set the date the payment was received (defaults to today). |
| Reason | Select or enter the reason for the payment (e.g., Lesson Payment, Block Booking, Test Fee). |
| Pupil | Assign the payment to the correct active pupil. |
Receipt Options
Send Email Payment Receipt: Toggle this on if you want the pupil to receive a receipt via email.
Uncheck this box if you do not wish to send a receipt.
Save the Payment
Once all details are correct, tap the tick. The payment will now be recorded in your Money section and linked to the pupil's account for future reference.