
You can log an expense in the app using two different methods—choose the one that suits your workflow best.
Two Ways to Add an Expense
Option 1: From the Money Section
Navigate to "Money" (the third icon on the lower navigation pane).
Tap "Expenses" to open the expense form.

Option 2: Using the Quick Add Button
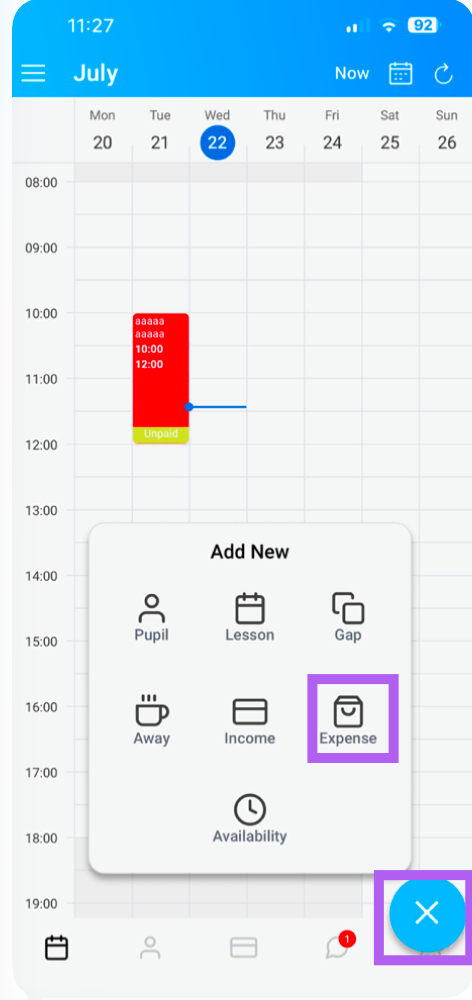
Tap the blue circle (+) icon (usually at the bottom of the screen).
From the options that appear, select "Expenses."
Complete the Expense Details
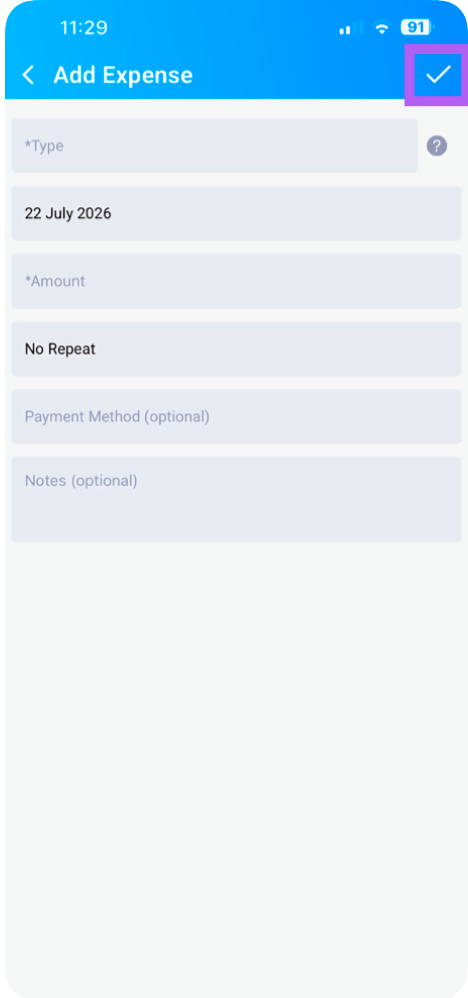
Once you've chosen your preferred method, you'll be taken to the Add Expense screen. Fill in the following details:
| Field | Description |
|---|
| Amount | Enter the expense amount. |
| Date | Set the date the expense was incurred (defaults to today). |
| Type | Tap to select the expense category from the dropdown list (e.g., Fuel, Maintenance, Insurance, Advertising, Office Supplies). |
| Pupil (Optional) | If the expense relates to a specific pupil, you can assign it to them for tracking purposes. |
| Notes (Optional) | Add any additional details or reference information. |
Tip: Similar to adding income, changing the "Type" field allows you to select the specific expense you're accounting for—making it easier to track your business costs over time.
Save the Expense
Once all details are correct, tap the tick top right The expense will now be recorded in your Money section and included in your overall financial summary.
Tip: Regularly logging expenses helps you keep accurate records for tax purposes and gives you a clear picture of your business profitability.