
Managing Diary Gaps with Gaps Plus
The Gaps Plus feature gives you greater control over how empty slots in your diary are displayed to pupils and how they can book them—helping you fill last-minute availability while protecting your schedule.
Setting Up Gaps Plus
1. Open the settings
Launch the Total Drive app.
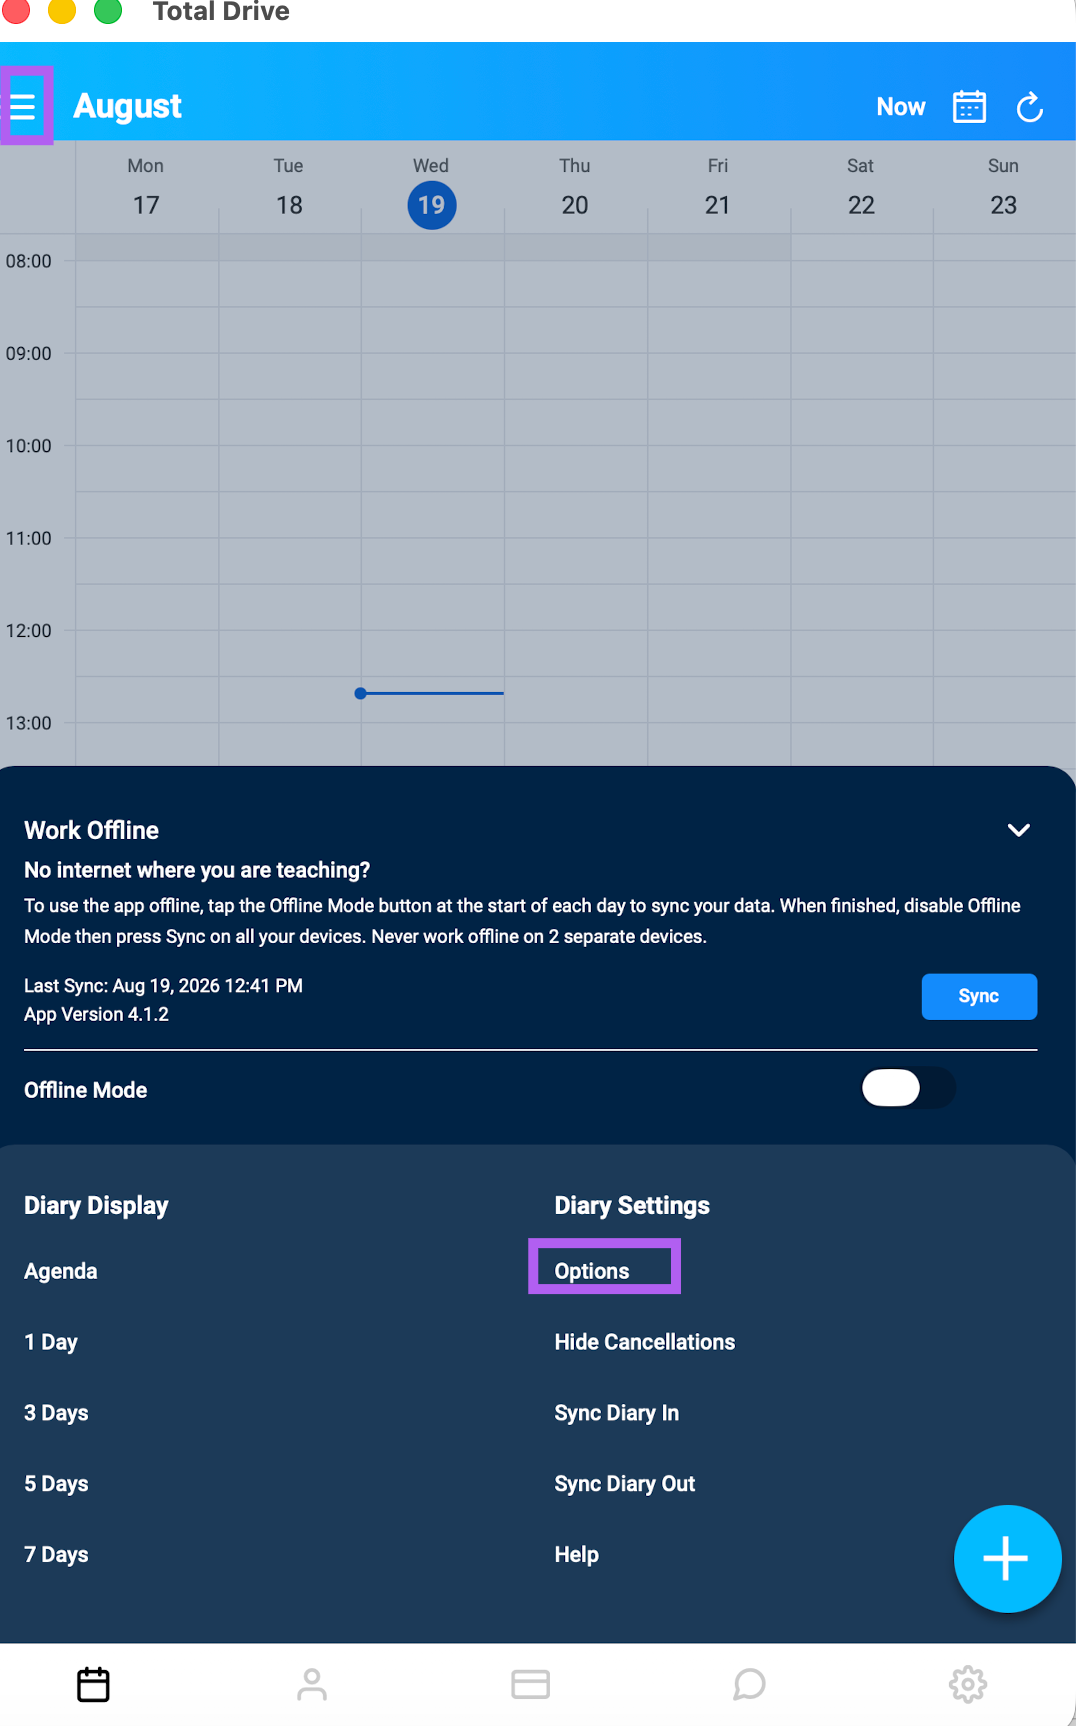
Tap the ☰ (menu) icon in the top-left corner.
Go to Options under Diary Settings.
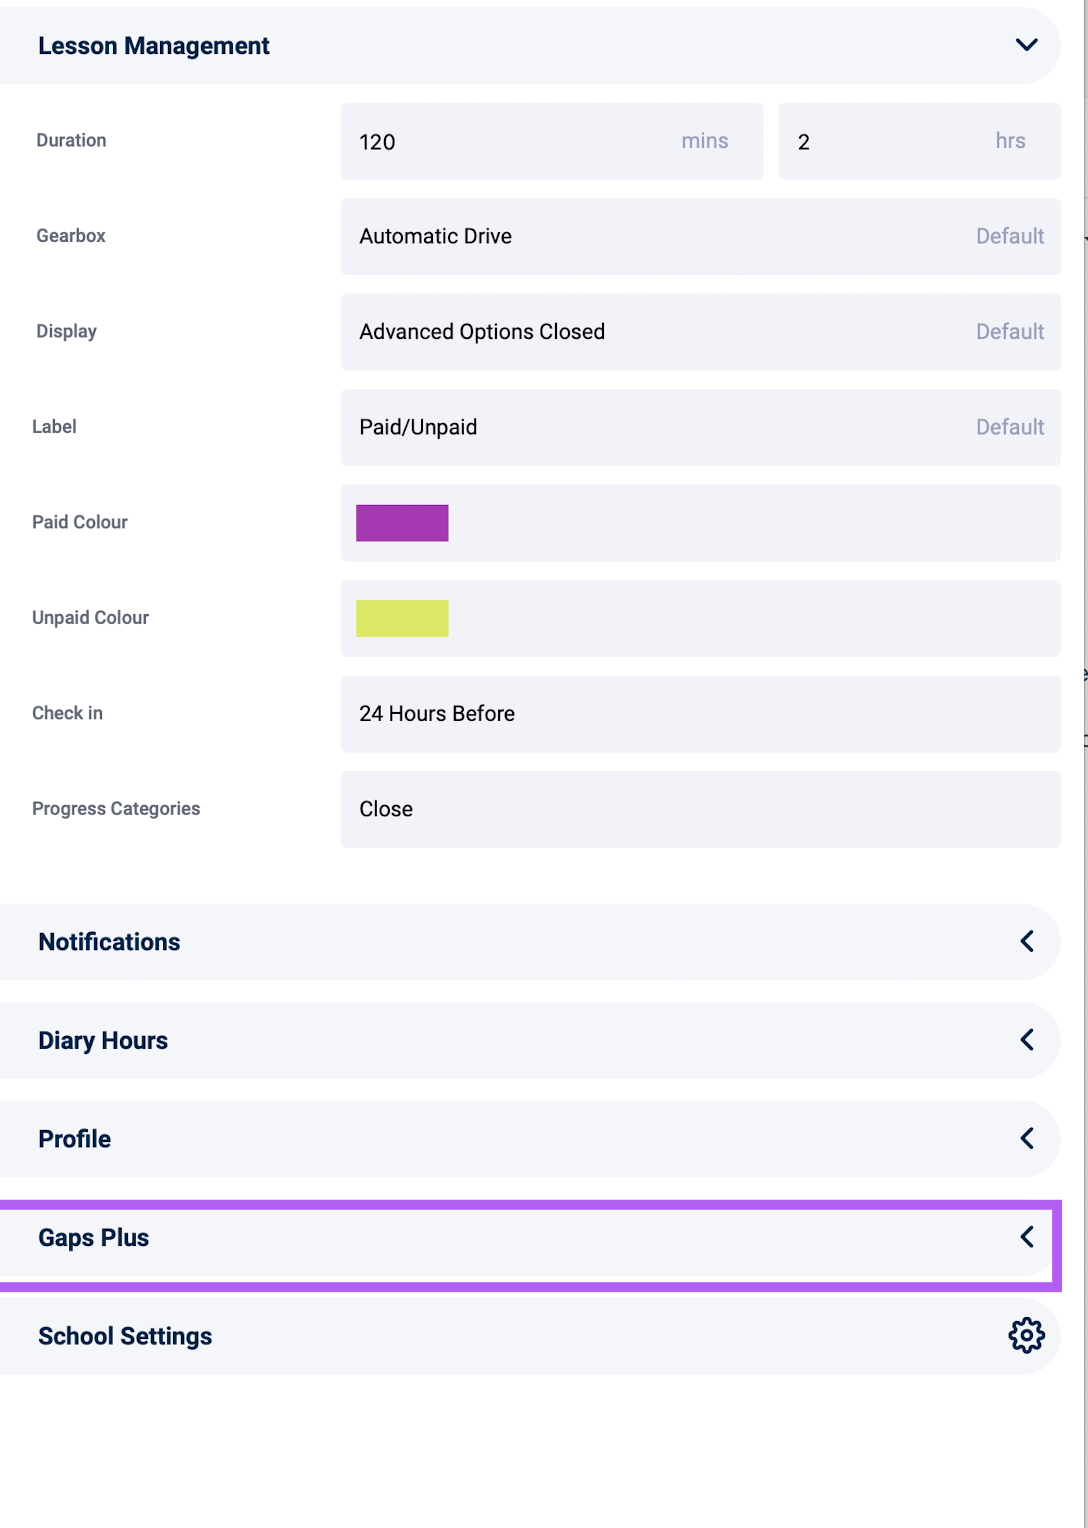
Scroll down to Gaps Plus and tap the drop‑down arrow to expand the settings.
2. Configure your preferences
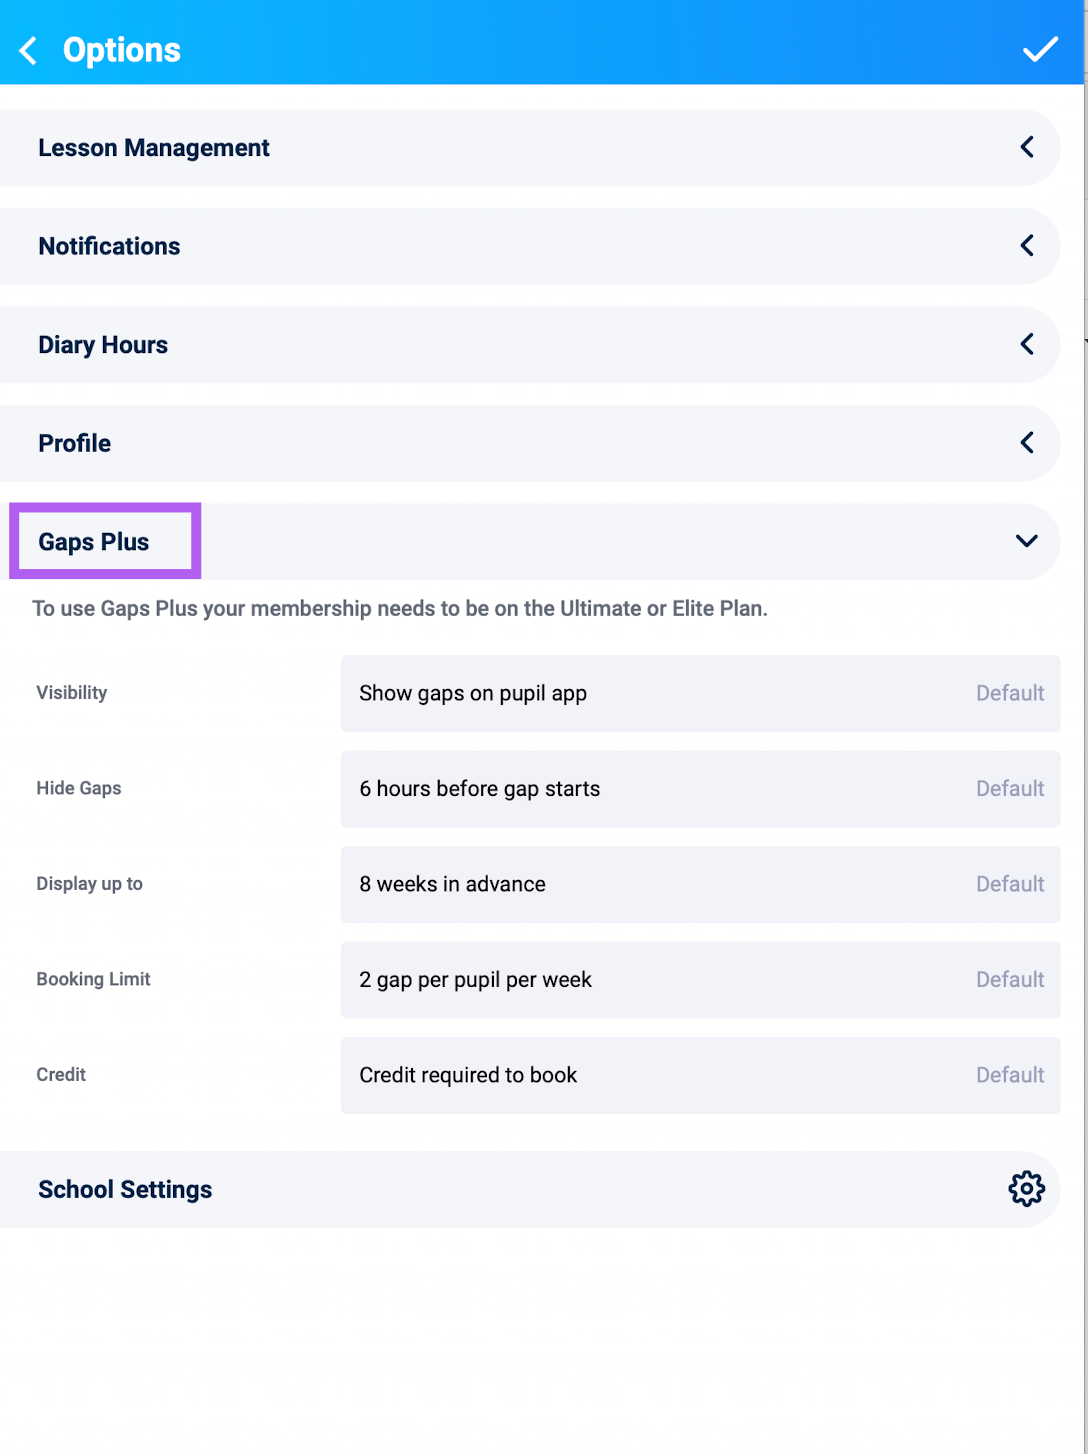
You can adjust the following options:
Visibility – Decide whether gaps are shown to pupils in their app at all.
Hide gaps – Automatically hide a gap within a set time before it starts (e.g., 2 hours before).
Display – Control how far in advance gaps appear to pupils (e.g., 1 day, 3 days, or 1 week ahead).
Booking limits – Restrict how many gaps a single pupil can book per week.
Credit – Choose whether pupils need to have credit to book a gap, or allow booking without credit.
3. Save and activate
Once you've set your preferences, the feature is active and ready to use—no further steps are required. To save click the tick at the top right.
Using Gaps Plus to Add a Gap
1. Create a gap
Open the Total Drive app.
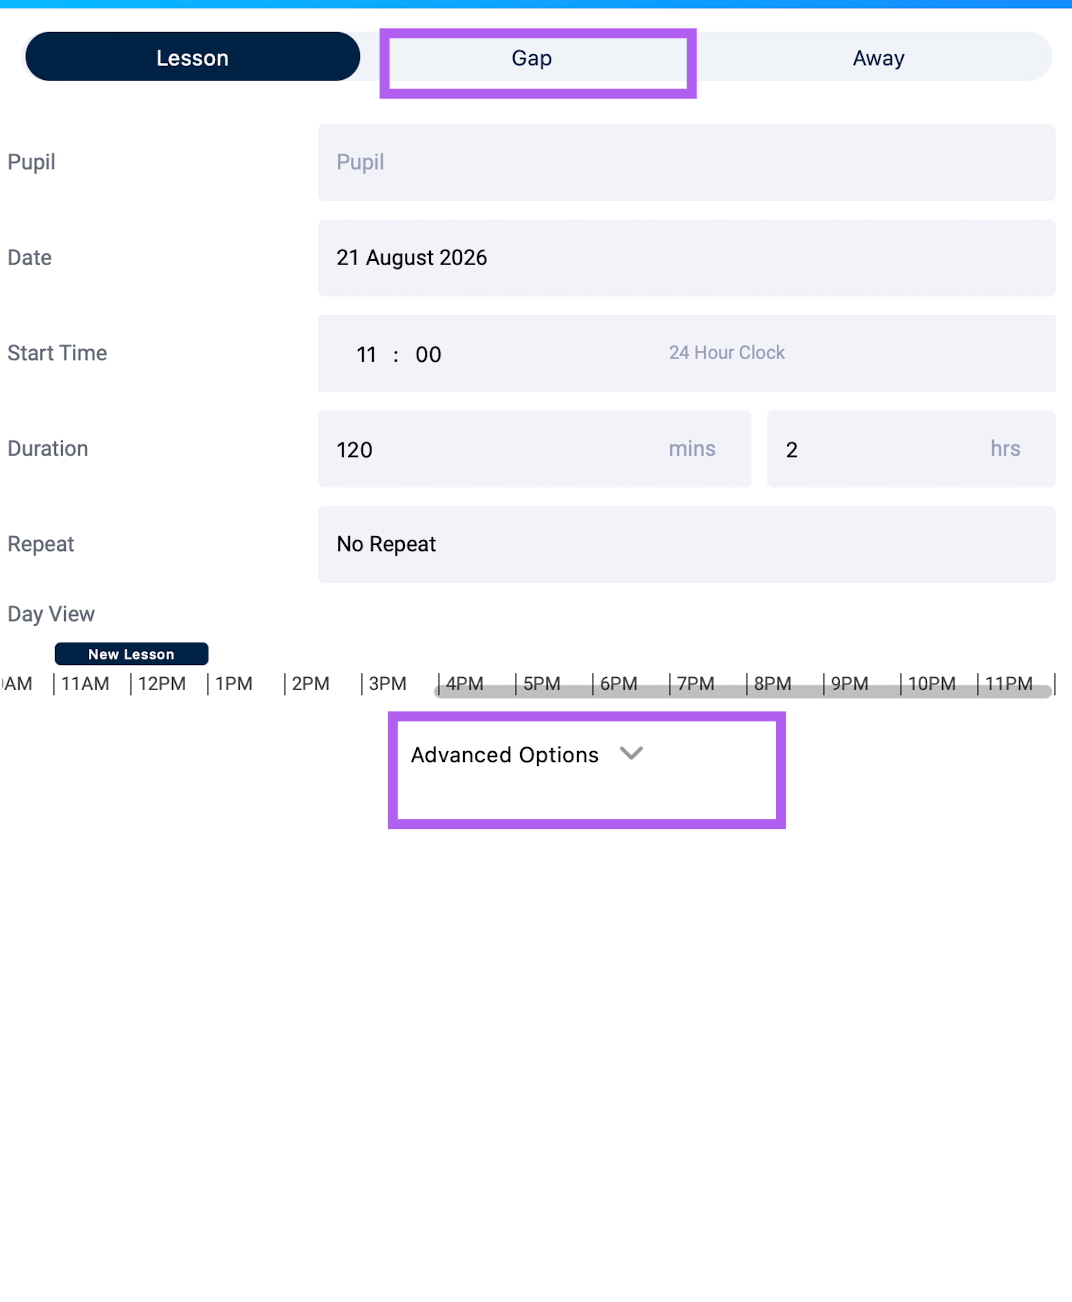
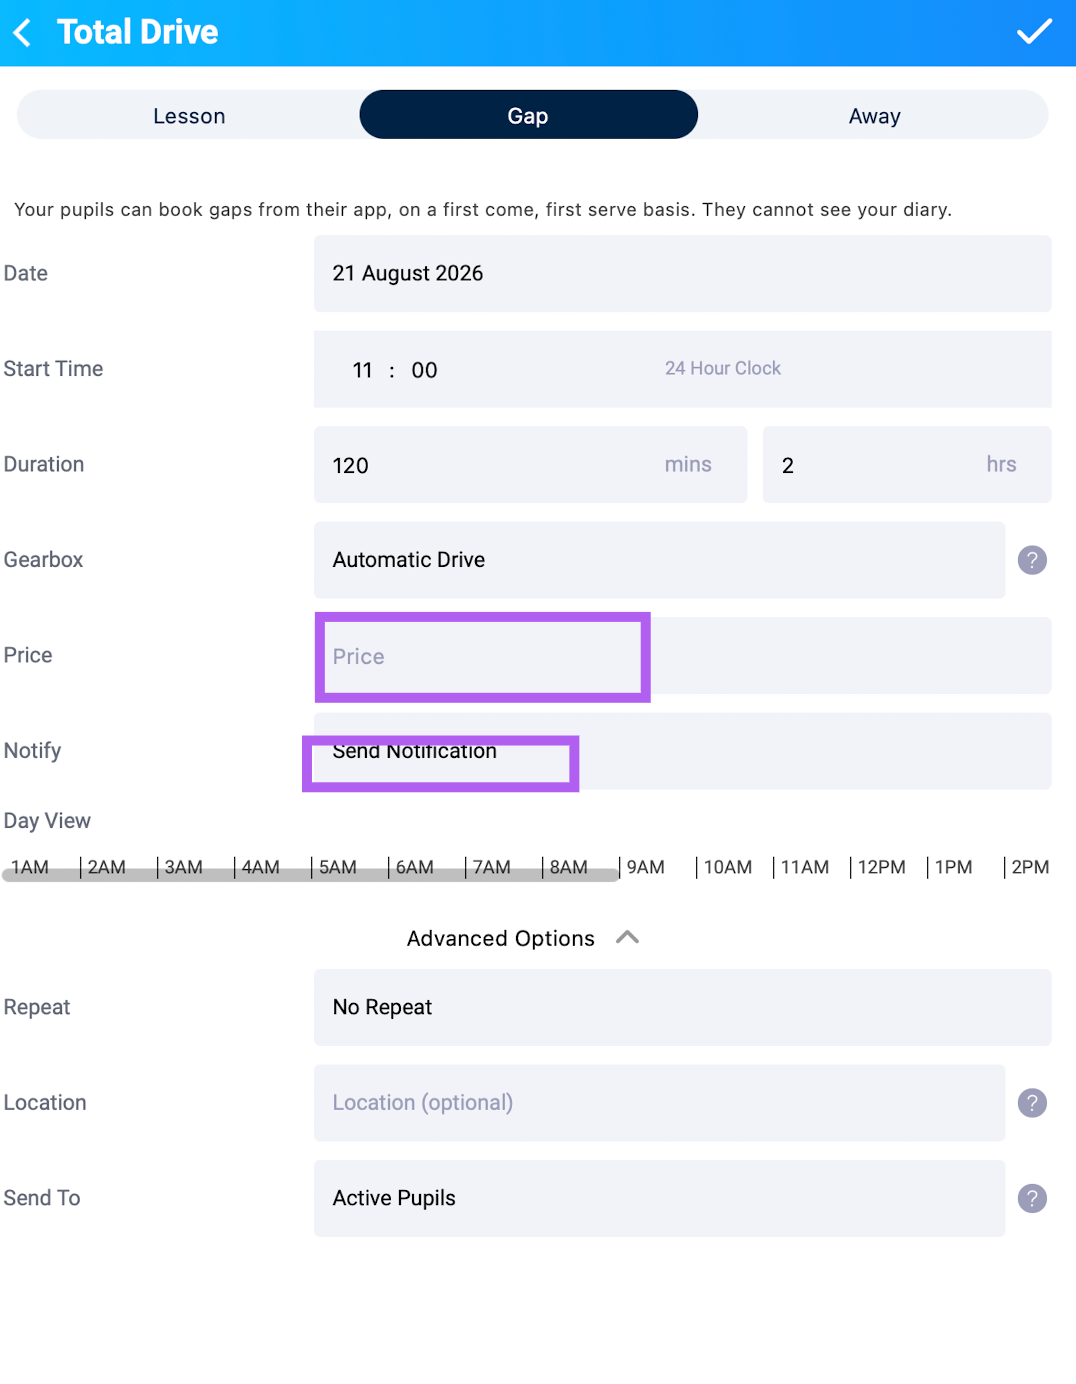
Tap either the diary view or the quick add button to add a new gap.
Open advanced options if you want to add location
2. Set the details
Fill in the required information (date, time, duration, etc.).
Add a price for the gap—this is essential, as pupils will need to pay before they can book it.
Choose to send notification to pupils
3. Save
Tap the tick icon in the top-right corner to save the gap.
Once saved, the gap will appear to pupils according to your Gaps Plus settings, and they must complete payment before securing the slot.
? Need more help?
For further details on managing gaps, click below to view the full guide.
https://totaldrive.freshdesk.com/a/solutions/articles/80001125359